Don't Sleep on Input Curves!
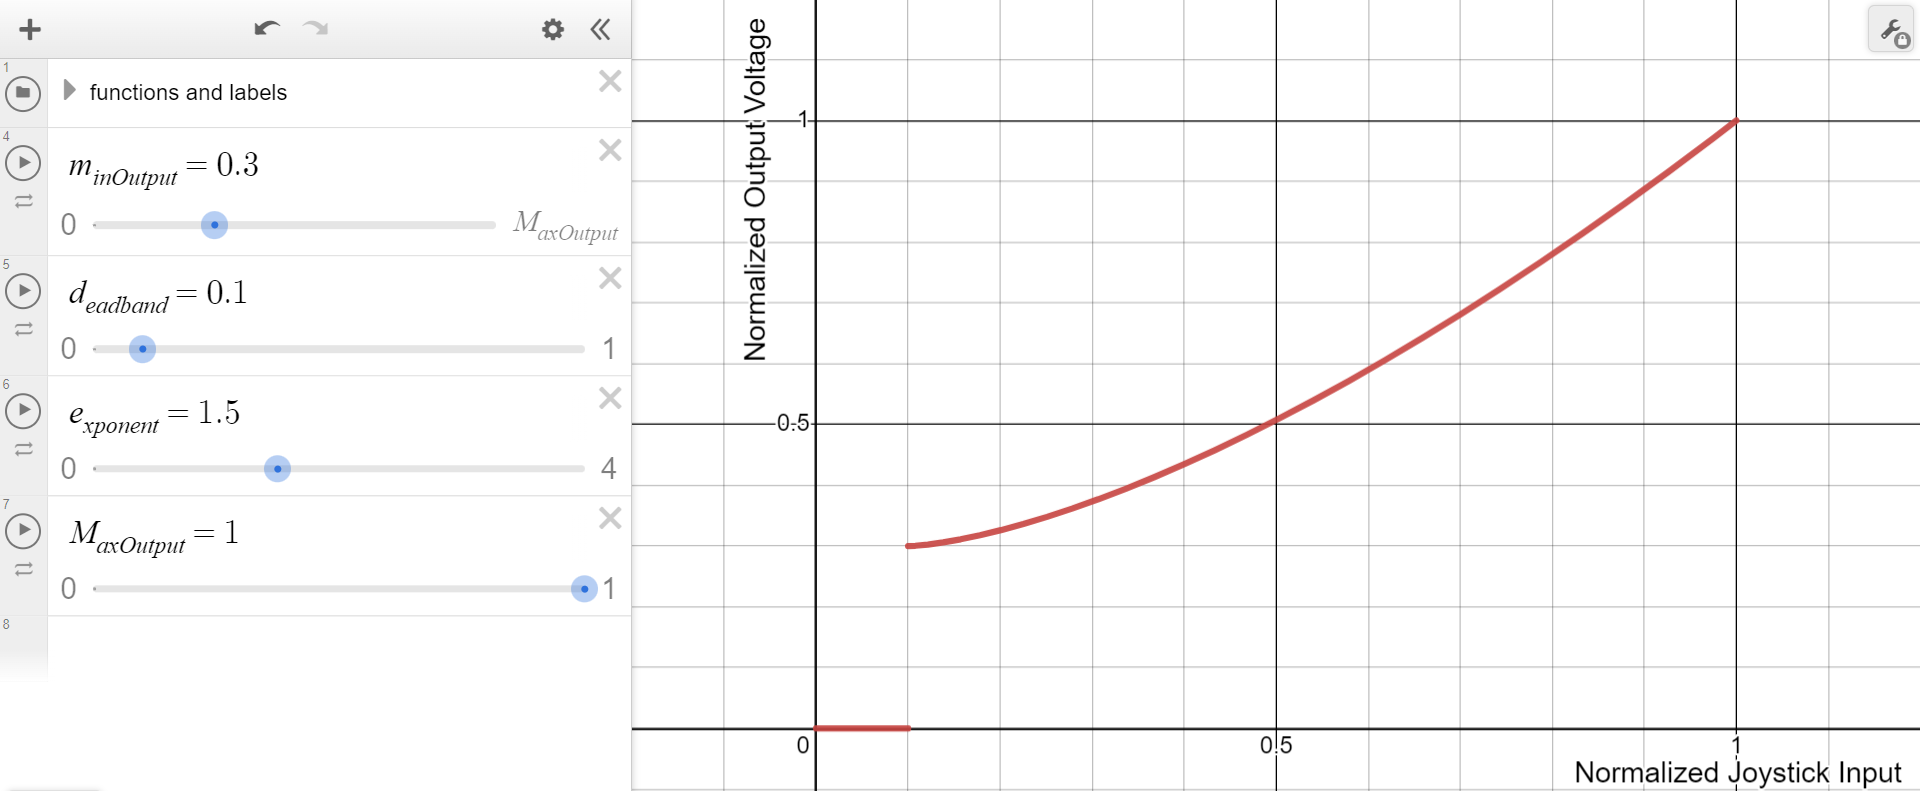 A lot of folks put their drivetrain together and find they have a hard time controlling their robot. While practicing is the most important way to improve, you have other tools at your disposal to make driving your robot easier. The problem is not just that you don't have practice, there are other factors working against you! These problems, in the order you should solve them, are as follows:
- Your motors do not begin to move until they overcome friction
- Your controller is not perfect
- The slower your robot goes, the more control you need
- Some robots are just too fast to drive
setDeadband(), setMinimumOutput(), setExponent(), and setMaximumOutput(). These functions collectively are known as “Input Curves” or sometimes “Motor Curves” and are what we use to solve the problems listed above.
How to use these functions in your code
Each function takes a single float as an input and can be called fromsetup(). Start by adding these four lines to your setup() function, these set the four values to their default. Change the value passed to each function as you tune your robot.
				// default function parameters
				drivetrain.setMinimumOutput(0.0);
				drivetrain.setDeadband(0.0);
				drivetrain.setExponent(1.0);
				drivetrain.setMaximumOutput(1.0);
Your motors do not begin to move until they overcome friction
All motors have some friction in them that keeps them from moving until you give them enough voltage to overcome that friction. So why bother giving them anything less than that voltage? This is what the functionsetMinimumOutput() is for. Using this function lets us claim more of the joysticks movement range for useful output voltage values, giving you finer control.
The best way to find this is by slowly pushing forward on your control stick until the motor just begins to move. look at your throttle value in Alfredo-ConnectDesktop when this happens. It may be tempting to use that value as the minimum for your motors, but it's reasonable to use less than that. Why? Because kinetic friction is always less than static friction. In matches most robots are always moving, so the real friction to worry about is less than you just measured. You don't want to take away too much of the voltage range you have access to.
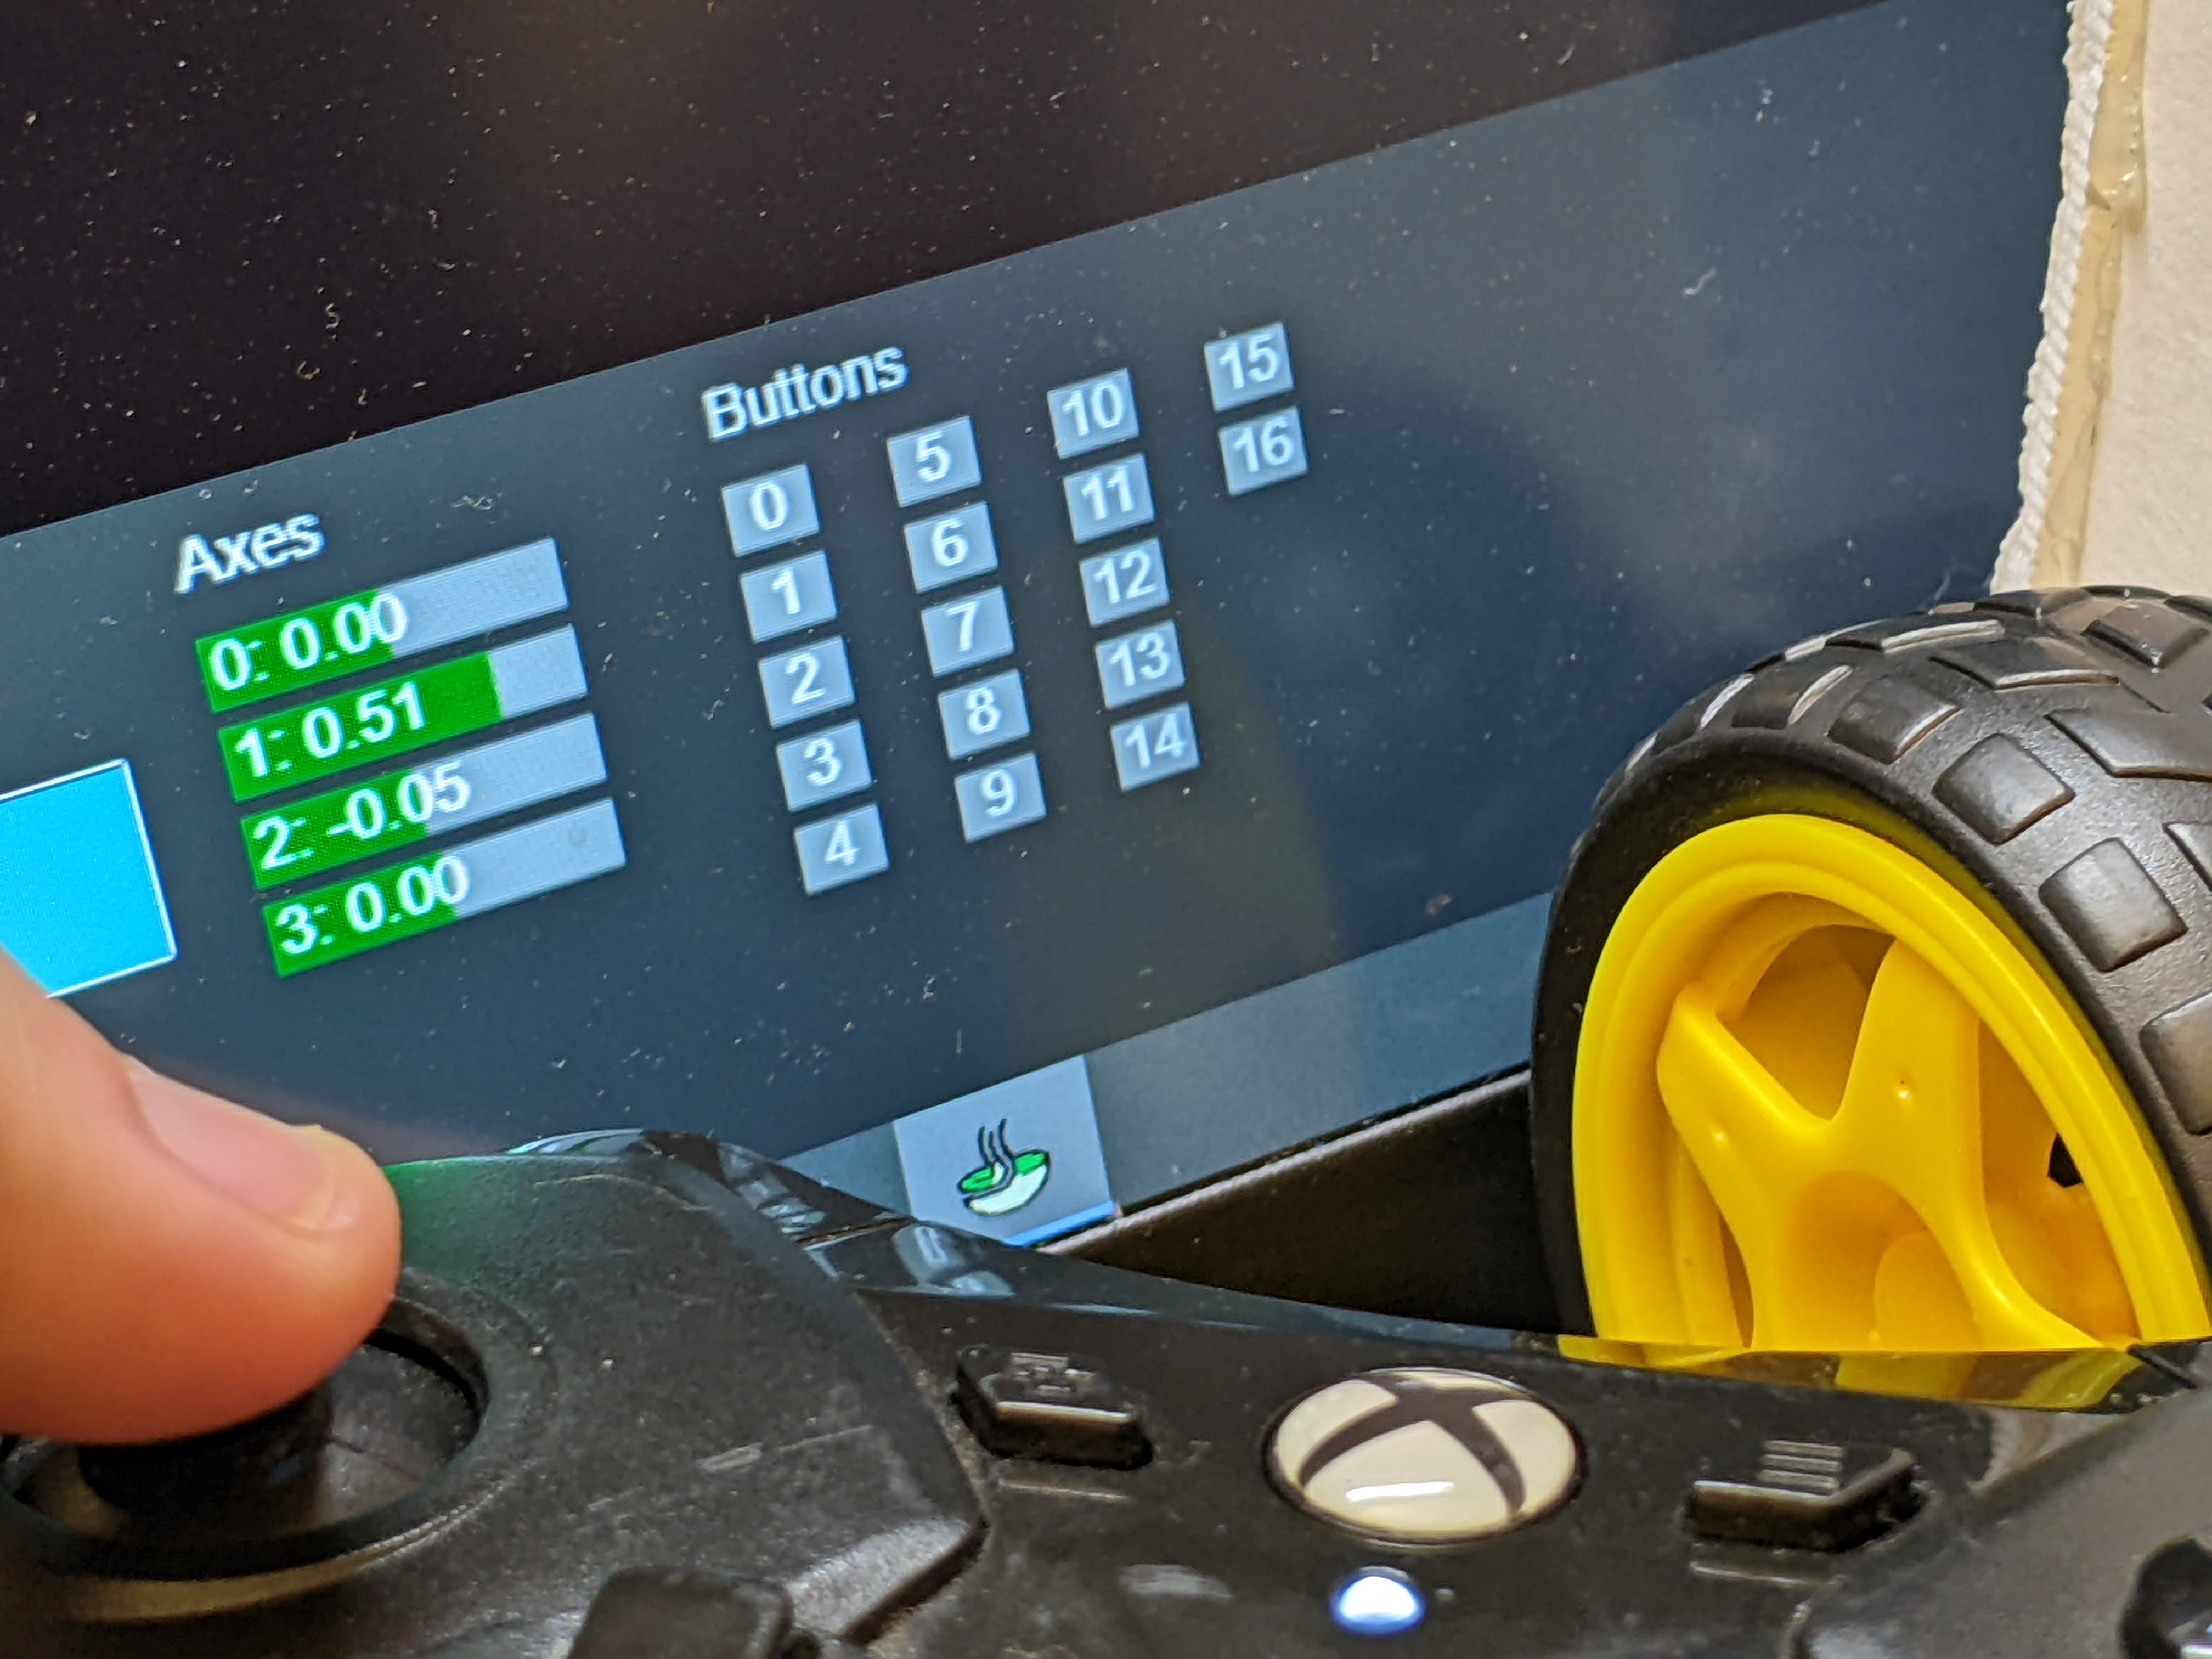 I measured about 0.5 power, but I like to use between 0.2 and 0.4 on my robots. It's a good idea to play around with the value and find something you are comfortable with.
				// recommended starting value
				drivetrain.setMinimumOutput(0.3);
Your controller is not perfect
No gamepad is perfect. The joysticks will almost always send some small value, even if you are not touching them. This region, where the joystick returns to when you let go of it, is known as the deadzone or deadband. You never want your robot to move when the stick is in the deadband, this is what the functionsetDeadband() is for.
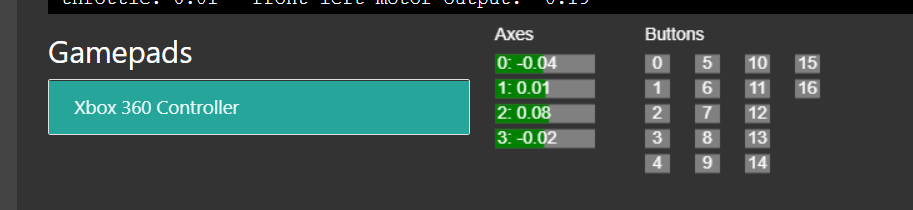 For example, by looking at AlfredoConnect-Desktop, I found an error of at least 0.08 when I was not touching the sticks. My drivetrain is being sent 8% of its max voltage even though I'm not driving! Sometimes I will use a value as high as 0.1 just to be safe.
				// recommended starting value
				drivetrain.setDeadband(0.1);
The slower your robot goes, the more control you need
This is the most subjective but probably most useful function. The idea is that most drivers want more control at slow speed and need less control at high speed. We want more of the middle range of our joystick to produce a shallower range of voltages, while the full throttle range can be much steeper. Traditionally the way to achieve this was by “squaring your inputs”, raising a joystick value to the power of 2 makes the middle range of the input result in a shallower output. For example an input of 0.5 results in an output of 0.52 = 0.25, quarter the voltage. But we can use other exponents too, it is all up to the driver's preference. I have seen values between 1 and 3 work, I recommend starting with 1.5 and going from there.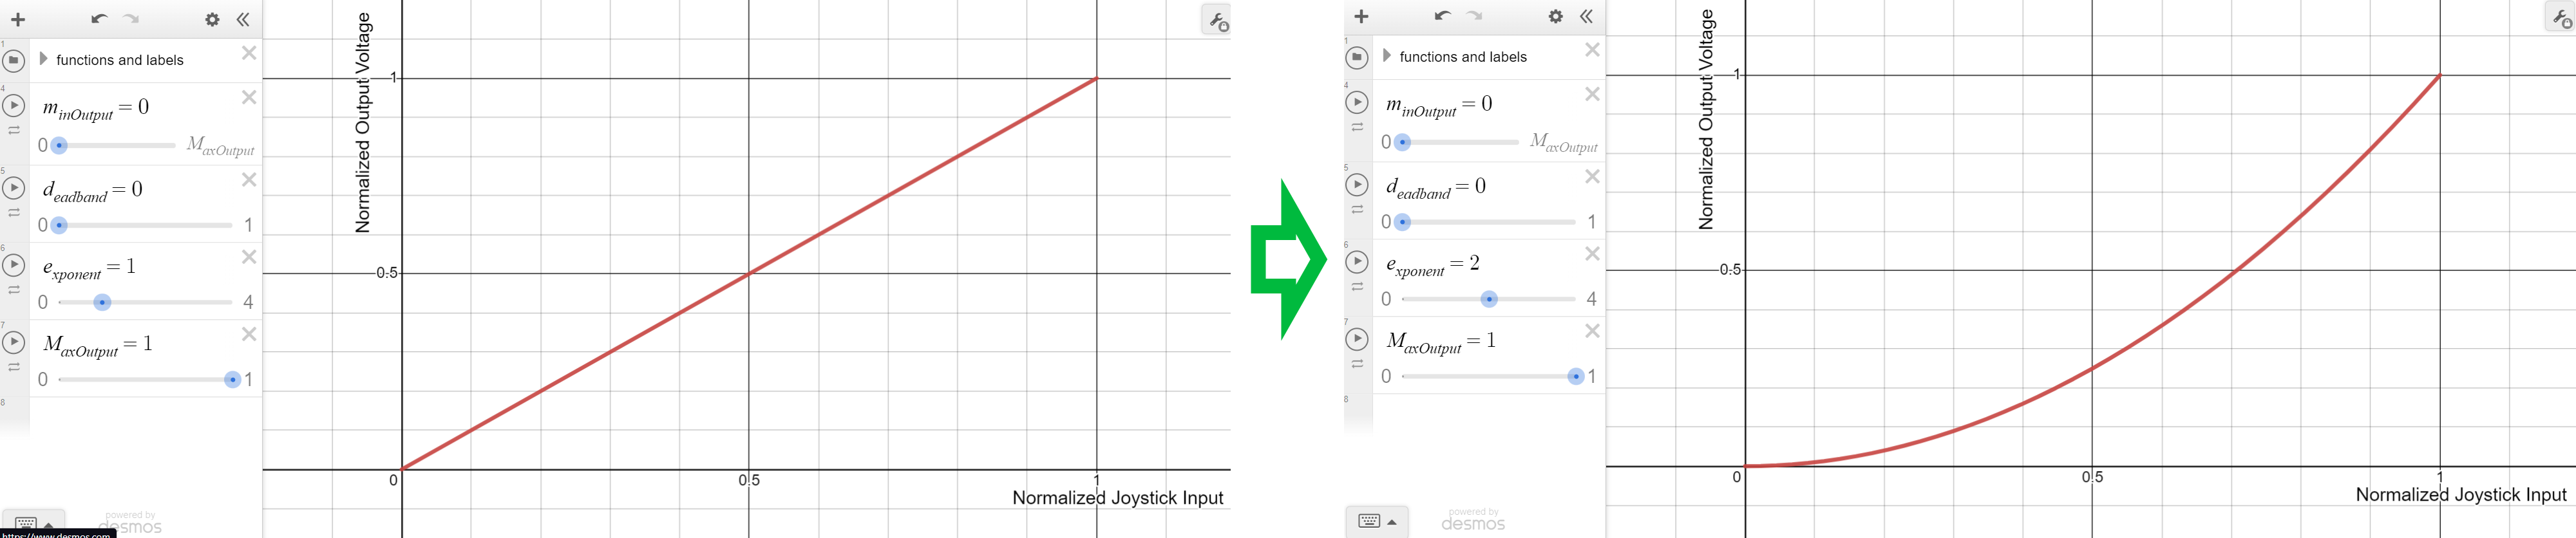 If this explanation didn't make sense to you I recommend you play around with this Desmos graph. It shows you how the exponent and the other constants change how your controller input values map to your motor output values. And like the other constants, the important part is to play around with different values and find ones you like.
				// recommended starting value
				drivetrain.setExponent(1.5);
Some robots are just too fast to drive
Most robots with TT drive won't need this, but I’ve seen a few with high power N20 drive where this was useful. The problem is some robots are just too fast to drive controllably. On these robotssetMaximumOutput() can be used when controllability is more important than top speed. Values around 0.8 get the job done.
				// recommended starting value
				drivetrain.setMaximumOutput(1);
Can I use these for motors other than my drivetrain?
Yes you can use these functions for any motor. Elevators, intakes, anything. Just not servos.In summary
Input curve functions are an underutilized tool to improve robot performance. It’s a good idea to experiment with different values to find what you feel the most comfortable with. And as always, if you have trouble with this or other code please reach out to the MiniFRC Discord server!
				drivetrain.setMinimumOutput(0.3);
				drivetrain.setDeadband(0.1);
				drivetrain.setExponent(1.5);
				drivetrain.setMaximumOutput(1);